Unlocking the Secret to Homemade Delight: How to Make Labneh from Yogurt
Homemade cheese might sound like an intimidating culinary endeavor, reserved for seasoned chefs or those with extensive free time. But what if we told you there's a simple, stress-free way to create your own creamy, delectable spread right in your kitchen, requiring little more than a container of yogurt and a bit of patience? Enter labneh, the versatile Middle Eastern "yogurt cheese" that's rapidly gaining popularity worldwide. This comprehensive guide will walk you through
how to make labneh from scratch, transforming ordinary yogurt into an extraordinary culinary delight that's both healthy and incredibly satisfying.
Forget complicated processes and specialized equipment; making labneh is about as straightforward as it gets. It's a testament to the power of simple ingredients and a technique that has been perfected over centuries. Not only will you discover a newfound culinary skill, but you'll also unlock a world of flavor and nutritional benefits, turning a humble dairy product into a gourmet experience.
What Exactly Is Labneh? The Middle Eastern Secret Revealed
Often described as a "yogurt cheese," labneh (sometimes spelled labaneh or labne) is a beloved staple of Levantine cuisine, deeply rooted in the culinary traditions of countries like Palestine, Lebanon, Syria, and Jordan. Its name itself, derived from the Arabic word "laban" for yogurt, hints at its primary ingredient. But unlike the yogurt you spoon from a container, labneh is a strained and thickened version, resulting in a product that boasts a unique texture and flavor profile.
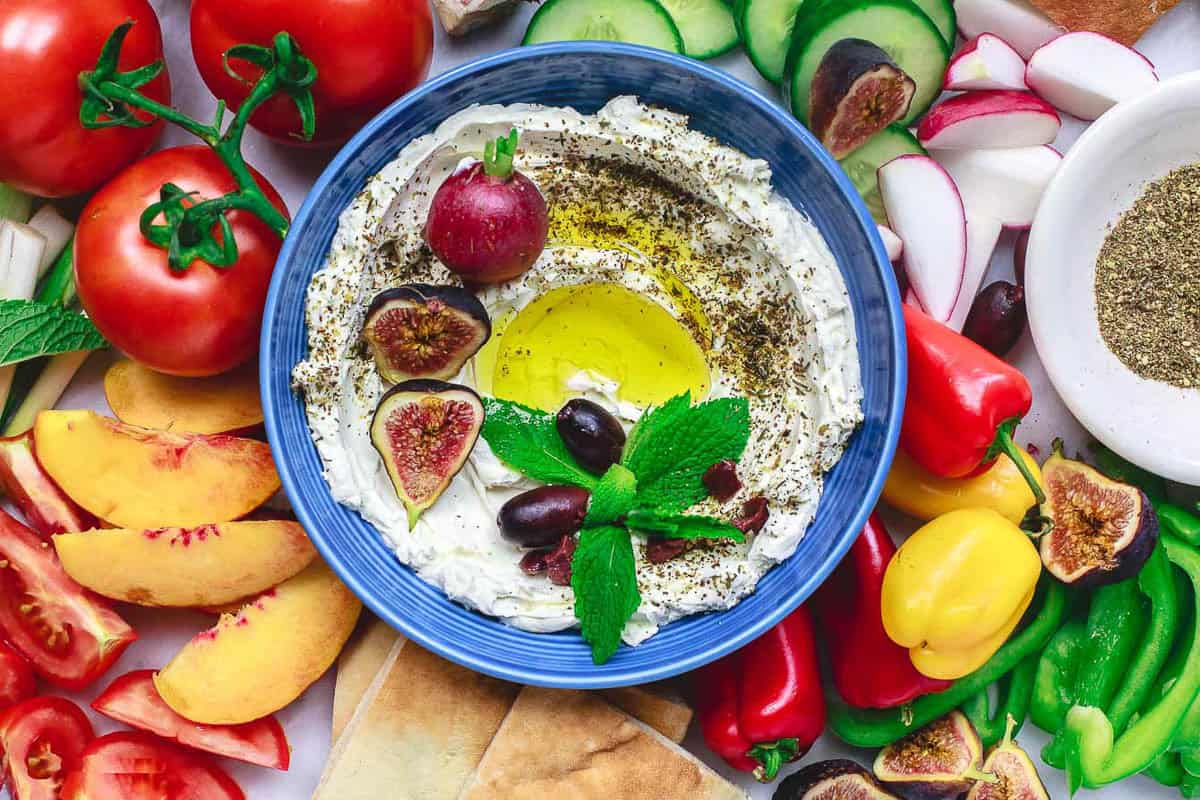
Imagine the rich tang of Greek yogurt combined with the smooth, spreadable consistency of whipped cream cheese, and you're getting close to labneh. It's a soft, luxurious spread that offers a delicate balance of creamy texture and a subtle, refreshing tartness. Traditionally, labneh is a cornerstone of the mezze platter – a selection of small dishes served as appetizers – and a common feature at the Levantine breakfast table, often paired with warm pita bread, fresh vegetables, and a generous drizzle of olive oil and za'atar.
Beyond its incredible taste and versatility, labneh also carries significant health benefits. As a food and nutrition expert with the National Dairy Council, Erin Coffield, RDN, LDN, highlights that labneh takes advantage of yogurt's nutritional powerhouse, providing essential protein, calcium, vitamins, and minerals. Opting for whole milk yogurt in your homemade labneh ensures a richer flavor and a good source of healthy fats.
Why Make Labneh at Home? Beyond the Grocery Store Aisle
While labneh is increasingly available in specialty stores and even some mainstream supermarkets, choosing to make it yourself offers a myriad of advantages that go beyond mere convenience.
*
Unbeatable Freshness and Control: When you make labneh at home, you know exactly what goes into it. There are no preservatives, artificial flavors, or unnecessary additives. You choose the quality of your yogurt, ensuring a pure, wholesome product.
*
Cost-Effectiveness: A large tub of yogurt is generally more affordable than an equivalent amount of pre-made labneh. Over time, making your own can lead to significant savings.
*
Customization to Your Palate: From the level of salt to the desired thickness, homemade labneh can be tailored precisely to your preferences. Do you prefer a softer, dip-like consistency or a firmer spread that can be rolled into balls? The straining time is entirely up to you.
*
A Sense of Culinary Achievement: Successfully making "homemade cheese" – even one as simple as labneh – is incredibly rewarding. It’s an accessible entry point into the world of cheesemaking that boosts confidence in the kitchen.
*
Enhanced Nutritional Value: By using whole milk yogurt, you ensure your labneh retains all the beneficial probiotics and nutrients, often in a more concentrated form due to the removal of excess whey.
The process is so surprisingly simple that many find themselves wondering why they didn't try it sooner. It demystifies the idea of cheesemaking, proving that delicious, healthy, and authentic spreads are well within reach of the home cook. For more insights on achieving that perfect "yogurt cheese" texture, check out
Homemade Labneh: Your Easiest Guide to Delicious Yogurt Cheese.
Your Step-by-Step Guide: How to Make Labneh from Yogurt
Ready to embark on this effortless culinary adventure? Here's everything you need to know to create your own luscious labneh.
Ingredients & Equipment You'll Need:
* 1 (32-ounce) container of whole cow’s milk yogurt or Greek yogurt (full-fat recommended for best results)
* 1/2 teaspoon salt
* Optional garnishes: 1 tablespoon olive oil, 1-2 teaspoons za’atar seasoning (or Everything Bagel spice blend)
* 2 (12″ x 12″) squares of cheesecloth (or a clean, thin linen kitchen towel, or multiple layers of coffee filters)
* A fine-mesh strainer or sieve
* A medium-sized bowl (to collect the whey)
* A large mixing bowl
* An airtight container for storage
Step 1: The Flavor Foundation – Seasoning Your Yogurt
In a large bowl, combine your yogurt with the 1/2 teaspoon of salt. Stir thoroughly until the salt is evenly distributed. While you *can* strain plain yogurt, salting it first is a crucial step that significantly enhances the final flavor and aids in the straining process. The salt not only seasons the labneh from the inside out but also helps to draw out excess whey more efficiently, contributing to a creamier, thicker product. For those new to making labneh, a good starting point is 1/2 teaspoon of salt per 32 ounces of yogurt. You can always adjust the seasoning slightly after straining if needed.
Step 2: The Art of Straining – Letting Gravity Do the Work
This is where the magic happens!
1. Set up your straining station: Place a fine-mesh strainer over a medium-sized bowl. The bowl should be large enough to hold the whey that drains from the yogurt without the strainer touching the bottom.
2. Line the strainer with your cheesecloth, allowing a few inches to hang over the sides. If using a thin kitchen towel or coffee filters, ensure it's clean and provides adequate coverage.
3. Carefully spoon the seasoned yogurt into the lined strainer.
4. Gently gather the hanging sides of the cheesecloth over the top of the yogurt, creating a loose bundle. This protects the yogurt from air exposure in the refrigerator.
5. Transfer the entire setup (bowl, strainer, yogurt in cheesecloth) to your refrigerator.
6. Allow the yogurt to strain for 24 to 48 hours. The longer it strains, the thicker and firmer your labneh will become. For a softer, spreadable dip consistency, 24 hours is often sufficient. For a texture akin to a firm cream cheese that can be rolled into balls, aim for 48 hours or even slightly longer.
7. Check on your draining labneh periodically, especially if straining for a longer duration. Discard the accumulated whey from the bottom bowl halfway through or whenever it gets full, to ensure optimal drainage and prevent the yogurt from sitting in the collected liquid.
Step 3: The Grand Reveal – Your Homemade Labneh Awaits!
After the desired straining time, your labneh is ready!
1. Carefully unwrap the cheesecloth bundle. You'll find a beautifully thick, creamy mass of labneh.
2. Gently scrape the labneh out of the cheesecloth into an airtight container.
3. Your labneh is now ready to be enjoyed! For a classic serving, press a slight dent in the center of the labneh in a shallow dish, drizzle generously with olive oil, and sprinkle with za’atar seasoning.
Creative Ways to Enjoy Your Homemade Labneh
The versatility of labneh is one of its most appealing attributes. Its tangy, creamy profile makes it a fantastic addition to both savory and sweet dishes.
*
The Ultimate Dip: Serve it as an appetizer dip for raw or grilled vegetables, pita bread, or sturdy crackers. Top with a swirl of olive oil, a sprinkle of za’atar, fresh mint, or a pinch of red pepper flakes for an extra kick.
*
Breakfast Brilliance: Spread it thickly on whole-grain toast, bagels, or English muffins in place of cream cheese. Pair with sliced cucumbers, tomatoes, or a sprinkle of Everything Bagel seasoning for a truly authentic Levantine breakfast experience. For more traditional pairings, consider insights from
Authentic Labneh: The Simple Secret to This Middle Eastern Spread.
*
Healthy Sandwich & Wrap Spread: Substitute mayonnaise or regular cream cheese with labneh in your lunch sandwiches or wraps for an instant nutritional boost and a delightful tangy flavor.
*
Savory Accompaniment: Serve alongside grilled meats, roasted chicken, or as a cooling counterpoint to spicy dishes. It's also excellent as a dollop on baked potatoes or alongside scrambled eggs.
*
Sweet Indulgence: Don't limit labneh to savory uses! Whip it with a touch of honey, maple syrup, or a dash of vanilla extract, then serve with fresh berries, sliced fruit, or a sprinkle of toasted nuts for a surprisingly light and healthy dessert.
*
Creative Cooking: Use it as a base for creamy sauces, or even as a unique "pizza" topping on flatbreads like lahmacun.
The possibilities are truly endless, limited only by your imagination! Labneh offers a delightful way to elevate everyday meals with its unique flavor and incredible texture.
Tips for Perfect Homemade Labneh Every Time:
*
Choose Your Yogurt Wisely: Full-fat plain yogurt (cow's milk or even goat's milk) yields the richest, creamiest labneh. Greek yogurt works wonderfully and often strains faster due to its already thicker consistency. Avoid flavored or low-fat yogurts, as they won't provide the same texture or flavor.
*
Don't Skip the Salt: Salt is essential for both flavor and efficient whey drainage. Adjust the amount slightly to your taste, but a little goes a long way.
*
Experiment with Straining Time: The duration in the fridge dictates the final consistency. If you want a spreadable "cheese," go for 48 hours. If you prefer a softer dip, 24 hours might be perfect.
*
Alternatives to Cheesecloth: If you don't have cheesecloth, a clean, thin cotton kitchen towel (like a flour sack towel), a nut milk bag, or several layers of sturdy coffee filters will work just as well.
*
Flavor Variations: Get creative with your seasonings! After straining, mix in finely chopped fresh herbs like dill, mint, or chives. A pinch of garlic powder, lemon zest, or smoked paprika can also add an exciting twist.
*
Storage: Store your homemade labneh in an airtight container in the refrigerator for up to 1-2 weeks.
*
Don't Waste the Whey: The liquid byproduct, whey, is packed with nutrients! Use it in smoothies, to water plants (diluted), or as a liquid in baking (breads, pancakes) for added moisture and protein.
Conclusion
Learning
how to make labneh from yogurt is a simple yet incredibly rewarding culinary skill that opens up a world of healthy, versatile, and delicious possibilities. This "yogurt cheese" is not only a fantastic way to elevate your everyday meals and snacks but also a testament to how effortlessly you can create gourmet-quality food right in your own kitchen. With minimal effort and just a few basic ingredients, you can enjoy a creamy, tangy spread that's packed with protein and probiotics. So, grab a container of yogurt, set up your strainer, and embark on this simple culinary adventure – your taste buds will thank you!